Making a Diaper Cake


Babies are always to be celebrated! The birth of a new baby is nothing short of a miracle from God. A friend of ours recently had a baby girl. We wanted to show our love and support to the family during this time, so we decided to make them a diaper cake. I am a very practical gift-giver. I like to give things that I know the family can use – and we all know that babies go through diapers. However, I always felt as if the box of diapers needed to be spruced up a little bit. The diaper cake does just that.
Making a diaper cake is very simple. All you need is a box of diapers, a few small toys or teethers, a small stuffed animal, a cardboard tube, rubber bands, and 12 feet of 2.5-inch ribbon. You can use any size diapers that you feel is appropriate. For this cake, I chose size 2 diapers since I wasn’t sure how many of the smaller sizes of diapers the family already had.
The first step is to roll the diapers and secure each with a small rubber band.
After all the diapers have been rolled, I like to start making the layers of the cake using a couple different-sized frying pans as a guide. After filling the frying pan with diapers, you can place a large rubber band around the entire layer of the “cake”.
In order to assemble the cake, I remove one of the diapers from the center of the layer and insert a cardboard tube (from a paper towel roll or a gift wrap roll). I then remove one of the diapers from the center of the second layer and slide that layer onto the same tube. The tube is the support to hold the cake together as one unit rather than separate layers.
Finally, if there are enough diapers left, you can make a third layer on the top (again, placing it on the same cardboard tube).
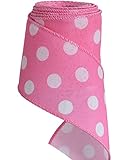
Now that the layers of the “cake” have been assembled, it is time to decorate. For this diaper cake, I went pretty simple, but feel free to make this cake as extravagant as you want! To begin decorating, tie the 2.5-inch ribbon around each layer of the cake, tying in a bow in the back. Make sure to tie the ribbon snugly. This will hold the individual diapers in each layer securely together. The width of the ribbon will hide any rubber bands. I chose a pink ribbon since they had a baby girl!
The cake topper can be any small stuffed animal or toy that you choose. I often go with a smaller stuffed animal. I secure it to the cardboard tube that comes through the center to the top of the cake. In this case, I was able to use a couple of paper clips and secure the tag from the stuffed animal to the cardboard tube.
For decorations on the side of the cake, I used a set of teethers. For this process, I tied some “curly ribbon” around each of the teethers and around a paper clip. I then used the paper clip to secure the toys to the ribbon around the center layer. Again, you can get creative with this. I have used a variety of rubber ducks. I have attached toys to all the layers of the cake. You can have many or a few “decorations”/toys on your cake. There is really no way to go wrong.
Your diaper cake is now finished. It makes a great gift for a baby shower or for the birth of another baby. It also works as a centerpiece for the baby shower. And this way, it isn’t just another decoration that will get thrown away. We know that this one will get used!


